GROWER’S KNOWLEDGE HUB

Start your orchid journey here — beginner-friendly guides, easy care tips, and advice for choosing your first Cattleya, Dendrobium, or Vanda.

Your First Orchid

Imagine bringing home a tiny treasure — your very first orchid. Its petals are still shy, but you can already picture the day it blooms in full color. You don’t need to be an expert to keep it happy. Start with an easy, forgiving variety like a Cattleya, Dendrobium, or Phalaenopsis. Place it where it gets gentle morning light, water it just enough to keep the roots fresh, and feed it a little each month. With each new leaf and bud, you’ll see the rewards of your care — and before long, you’ll be hooked on the joy of growing orchid

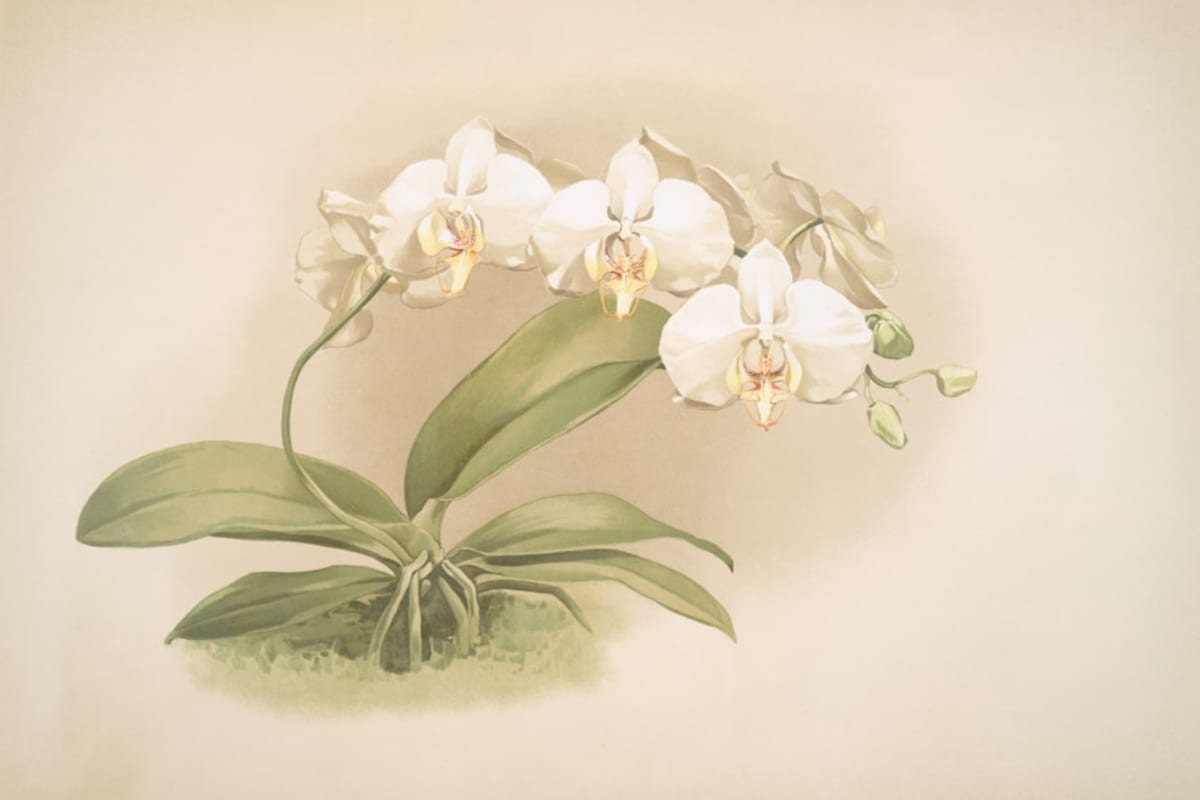
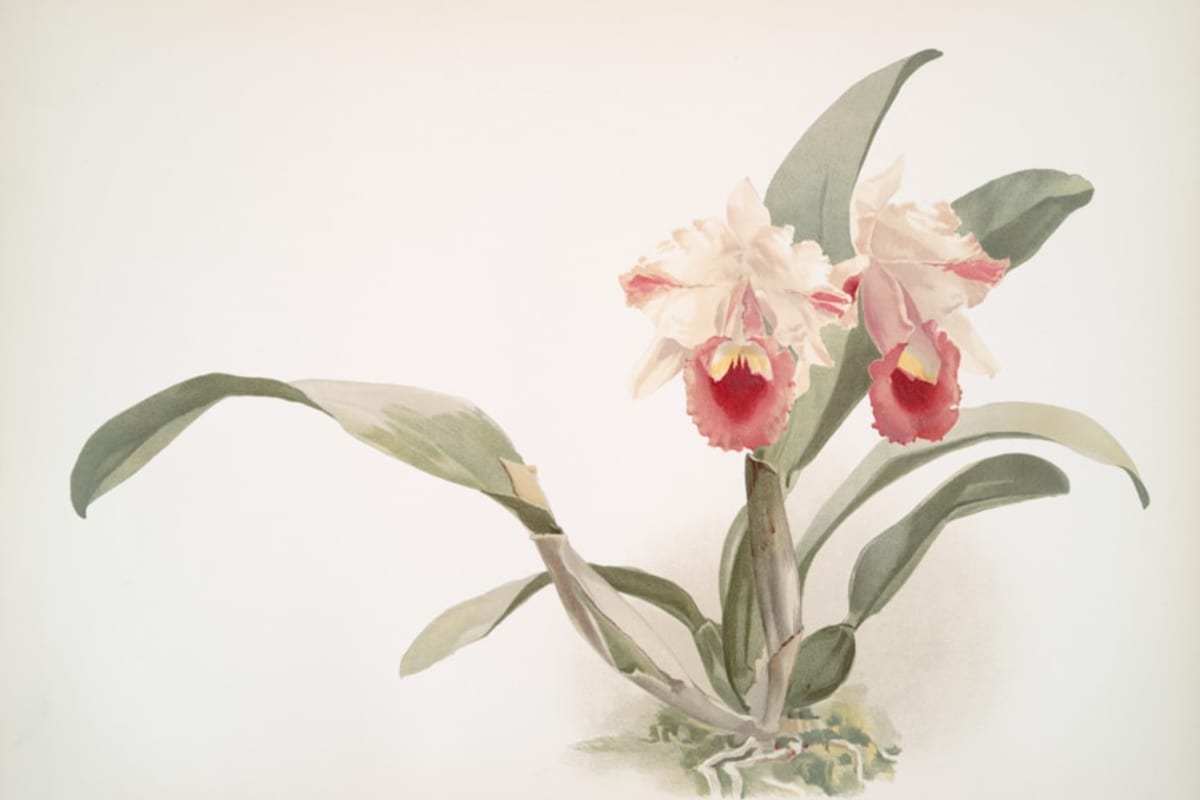
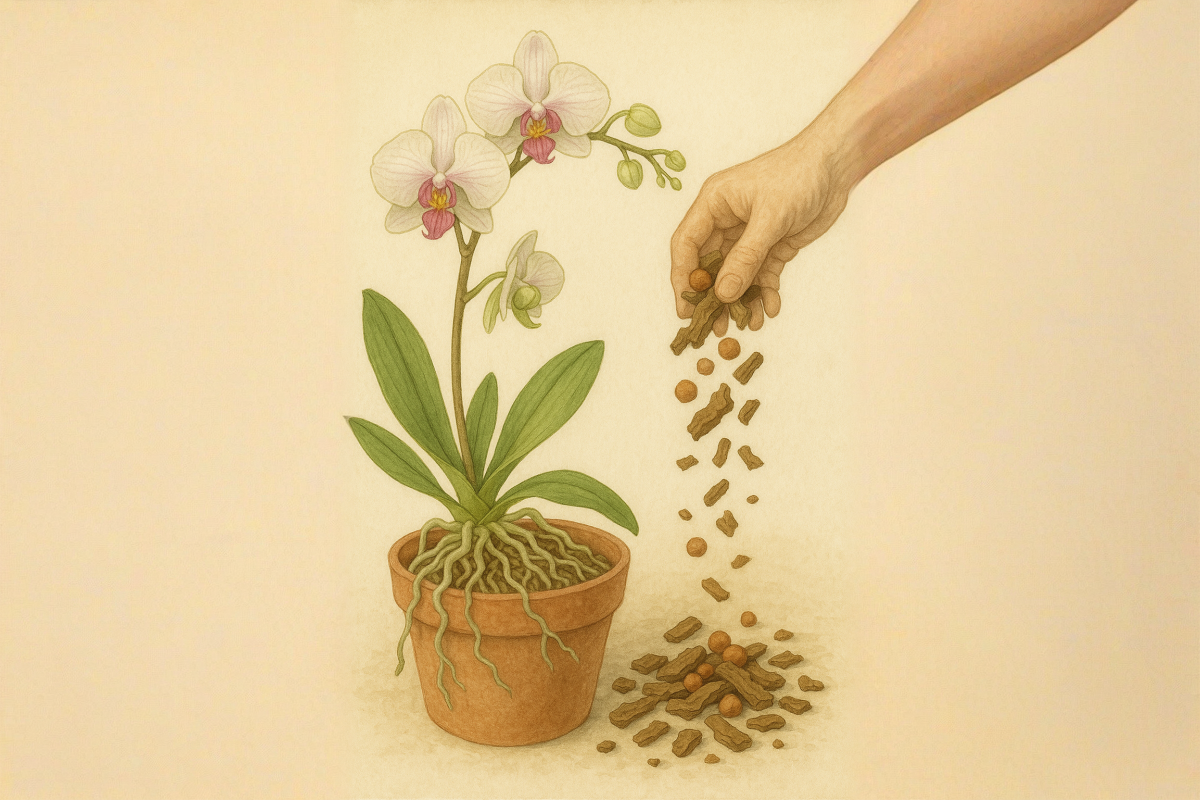
If you’re new to orchids, the best way to start is with varieties that are beautiful, forgiving, and proven to thrive in typical home conditions. Phalaenopsis, or “Moth Orchids,” are among the easiest — their thick leaves store water, their blooms can last for months, and they don’t require complicated care. Dendrobiums offer a completely different look, with tall canes covered in cheerful blossoms that may bloom more than once a year. For a true show-stopper, Cattleyas produce large, often fragrant flowers in stunning colors, rewarding even simple care with unforgettable displays. Each of these orchids can be grown indoors with bright, indirect light, weekly watering, and a little fertilizer during the growing season. Starting with one (or all three) will give you hands-on experience with different growth habits, bloom cycles, and care routines — the perfect foundation for your orchid journey.

If you’re ready for a more rewarding challenge, Vandas are breathtaking orchids known for their vivid colors, striking patterns, and often sweet fragrance. Unlike most orchids, Vandas prefer to grow with their roots exposed, absorbing moisture and nutrients from the air. They thrive in bright, direct sunlight for several hours a day — even outdoors in warm climates like Puerto Rico — making them ideal for growers with a sunny balcony or garden.

Start your journey with Caribbean Orchids. Whether you’re looking for your first beginner-friendly Phalaenopsis, a striking Cattleya, or an eye-catching Vanda, our collection is hand-selected for quality and beauty. We also carry premium fertilizers and care supplies to keep your orchids thriving. Visit our store or explore our online catalog today, and let us help you grow something truly extraordinary.

Orchids Care Basic

Orchid Care Basics – Simple Steps for Healthy, Blooming Plants

Caring for orchids doesn’t have to be complicated. With the right balance of light, water, food, and airflow, these beautiful plants can thrive for years and reward you with blooms season after season. Whether you’ve just brought home your first orchid or you’re looking to refresh your skills, learning the basics will set you up for success. In this guide, we’ll cover the essentials — from understanding your orchid’s light needs to mastering the right watering routine — so you can enjoy strong growth, vibrant leaves, and stunning flowers.

Orchids need the right balance of light to grow and bloom. Most thrive in bright, indirect light — too little light prevents flowering, while too much can scorch the leaves. Place them near an east or south-facing window with sheer curtains, or use grow lights if natural light is limited.

Water thoroughly, then let the roots dry slightly before watering again. Overwatering is the most common beginner mistake — it can cause root rot. Use room-temperature water and water in the morning so leaves and crowns dry by night. For most orchids, once a week is a good starting point, adjusting for your climate and potting medium.

Feed your orchids regularly during their active growth phase. A balanced orchid fertilizer (such as 20-20-20) at ¼ to ½ strength works well. In general, follow the “weakly, weekly” rule — dilute fertilizer and apply it every week during the growing season, reducing in winter or dormancy.

Most orchids enjoy daytime temperatures between 65–80°F (18–27°C) and slightly cooler nights. Good airflow helps prevent fungal and bacterial problems, so place your plants in a space with gentle air movement from a fan or open window.

Orchids should be repotted every 1–2 years, or when the potting medium breaks down. Use a fresh, well-draining orchid mix appropriate for your orchid type (bark, sphagnum moss, or a combination). Repot after flowering, trimming away dead roots and removing old medium.

Common Beginner Mistakes

Even the most enthusiastic new orchid growers can make simple errors that slow growth or prevent blooming. The good news? Most of these mistakes are easy to fix once you know what to watch for. In this section, we’ll cover the most common pitfalls — from overwatering to poor lighting — and show you how to avoid them so your orchids stay healthy and thrive for years to come.

1. Overwatering
The most common mistake new growers make is watering too often. Orchid roots need to breathe — too much water can cause rot and kill the plant. Always check that the potting medium has dried slightly before watering again.

2. Not Enough Light
Without enough light, orchids won’t bloom. Place them where they get bright, indirect light for most of the day, or supplement with grow lights if natural light is limited.

3. Using the Wrong Potting Medium
Garden soil suffocates orchid roots. Use a well-draining orchid mix such as bark, sphagnum moss, or a blend designed for your orchid type.

4. Ignoring Airflow
Orchids need gentle air movement to stay healthy. Poor airflow can lead to mold, fungus, and pests. A small fan or an open window can make a big difference.

5. Skipping Fertilizer
Orchids grown in pots can’t get nutrients from the ground. Use a diluted orchid fertilizer regularly during the growing season to keep them strong and blooming.

6. Repotting Too Late
If the potting medium breaks down or the roots are crowded, don’t wait — repot. Leaving orchids in old, compacted media can harm root health.

Repotting Step-by-Step​

Repotting an orchid is like giving it a fresh start — a chance to stretch its roots, breathe easier, and grow stronger.​

Imagine your plant has been sitting in the same potting mix for years. Over time, that mix breaks down, holding too much moisture and not enough air, slowly suffocating the roots. By repotting, you’re giving your orchid the healthy foundation it needs for new growth and future blooms.

One of the best choices for this fresh start is Orchiata bark — a premium, long-lasting medium made from sustainably sourced New Zealand pine. Unlike cheaper bark that breaks down quickly, Orchiata stays firm for years, keeping roots healthy and well-aerated.

Here’s how to do it:

  1. Choose the right time: Repot just after blooming, when new roots begin to appear.

  2. Remove the orchid from its pot: Gently loosen and remove old media from the roots.

  3. Trim dead or rotted roots: Healthy roots are firm and green or silvery-white; cut away any mushy, dark ones.

  4. Select the right pot: Clear orchid pots help you monitor root health and moisture levels.

  5. Add fresh Orchiata bark: Place a layer at the bottom, position your orchid, and fill in around the roots. Tap the pot lightly to settle the bark without packing it too tightly.

  6. Water lightly: Allow the plant to settle in its new home and resume regular watering after a few days.

Give your orchid the best start. At Caribbean Orchids, we stock fresh Orchiata bark, along with clear pots and all the supplies you’ll need to repot with confidence. Whether it’s your first repotting or your fiftieth, our team can help you choose the perfect materials for your orchid’s needs.

Fertilizing for Blooms

In nature, orchids sip nutrients from rainwater and decaying organic matter. At home, those nutrients must come from you. With the right products at the right time, you’ll get healthy roots, strong growth, and abundant blooms.

Understanding Orchid Nutrition

Orchids thrive when they receive the right balance of macronutrients:
Nitrogen (N) for leaves and roots
Phosphorus (P) for bud and flower development.
Potassium (K) for overall vigor and disease resistance. Micronutrients and natural biostimulants help keep them in peak condition.

Our Proven Fertilizer & Supplement Program

Raizal – Root Development: Encourages strong, healthy root growth and better nutrient uptake. Best for newly potted orchids, root growth phases, and plant recovery.

Superfos – Bloom Booster: High-phosphorus formula that triggers bud formation and improves flower size and color. Best for pre-bloom phases.

Lobbi 44 – Foliage Strength: Promotes lush, green leaves to fuel energy for future blooms. Best during active vegetative growth.

20-20-20 – All-Purpose Nutrition: Balanced formula for steady growth year-round. Works for all orchid types.

Codamin Radicular – Recovery & Energy: Amino acid–rich biostimulant for stressed orchids or post-bloom recovery.

Superthrive – Growth & Stress Recovery: Vitamin-based supplement to improve vigor and root development after repotting or shipping.

Phalaenopsis Special – Superthrive + Worm Leachate: Organic nutrients and beneficial microbes from worm leachate paired with Superthrive’s vitamins. Best for monthly feeding of Phalaenopsis outside the bloom cycle.

Application Tips

  • Dilute to ¼–½ strength (“weakly, weekly”).
  • Water first, then fertilize to avoid root burn.
  • Rotate between growth, root, and bloom formulas based on the plant’s stage.
  • Flush with plain water monthly to prevent salt buildup.

Why Buy from Caribbean Orchids

We don’t just sell fertilizers — we use them daily in our nurseries across Puerto Rico. Every formula, from Raizal and Superfos to Lobbi 44, 20-20-20, Codamin Radicular, and Superthrive (plus our Phalaenopsis combo with worm leachate), is tested on Cattleyas, Dendrobiums, Vandas, and Phalaenopsis in real growing conditions.

Advanced Care & Bloom Boosting

Repotting an orchid is like giving it a fresh start — a chance to stretch its roots, breathe easier, and grow stronger.​

Once you’ve mastered the basics, it’s time to unlock your orchids’ full potential. Advanced care isn’t just about keeping them alive — it’s about maximizing blooms, enhancing color and fragrance, and encouraging multiple flowering cycles each year. With the right techniques and products, a healthy plant can become a true showpiece.

Fine-Tuning Light & Temperature

  • Light: Gradually increase brightness for bloom-hungry orchids like Cattleyas and Vandas. Use sheer curtains to avoid leaf burn.
  • Temperature: Leverage an 8–12°F (4–7°C) night drop to trigger spikes, especially in Phalaenopsis.

Nutrient Strategies for Heavy Bloomers

  • Shift from a balanced feed to a high-phosphorus bloom booster as spikes form.
  • Alternate Superfos (flowers) with Lobbi 44 (leaf energy) during the run-up to bloom.
  • Use Raizal after flowering to rebuild strong roots for the next cycle.

Special Supplements

  • Superthrive: Support during seasonal transitions or after heavy blooming.
  • Codamin Radicular: Amino-acid biostimulant for quick recovery after stress or transport.
  • Phalaenopsis Special: Superthrive + worm leachate monthly outside the bloom cycle to build leaves and roots for future spikes.

Environmental Boosters

  • Maintain gentle airflow to extend bloom life and deter pests.
  • Raise humidity to 60–70% during spike and bloom phases, avoiding water pooling in the crown.

Orchid Shows & AOS Judging

With advanced care, your orchids can meet the high standards of the American Orchid Society (AOS)</strong) judging system. Proper tagging with the registered name is essential for eligibility. Well-grown plants with correct form, color, and flower arrangement can earn awards at local, regional, and national shows.

Why Buy from Caribbean Orchids

We use these professional-grade products in our own nurseries: Superfos, Raizal, Lobbi 44, Codamin Radicular, Superthrive, and our Phalaenopsis combo (Superthrive + worm leachate). Pair precise care with proven fertilizers to achieve more spikes, bigger flowers, and richer colors — and set yourself up for AOS-ready results.